.png)

September 25, 2018
The scheduling feature in SLP Toolkit just got a whole lot better! Here is a list of the changes:
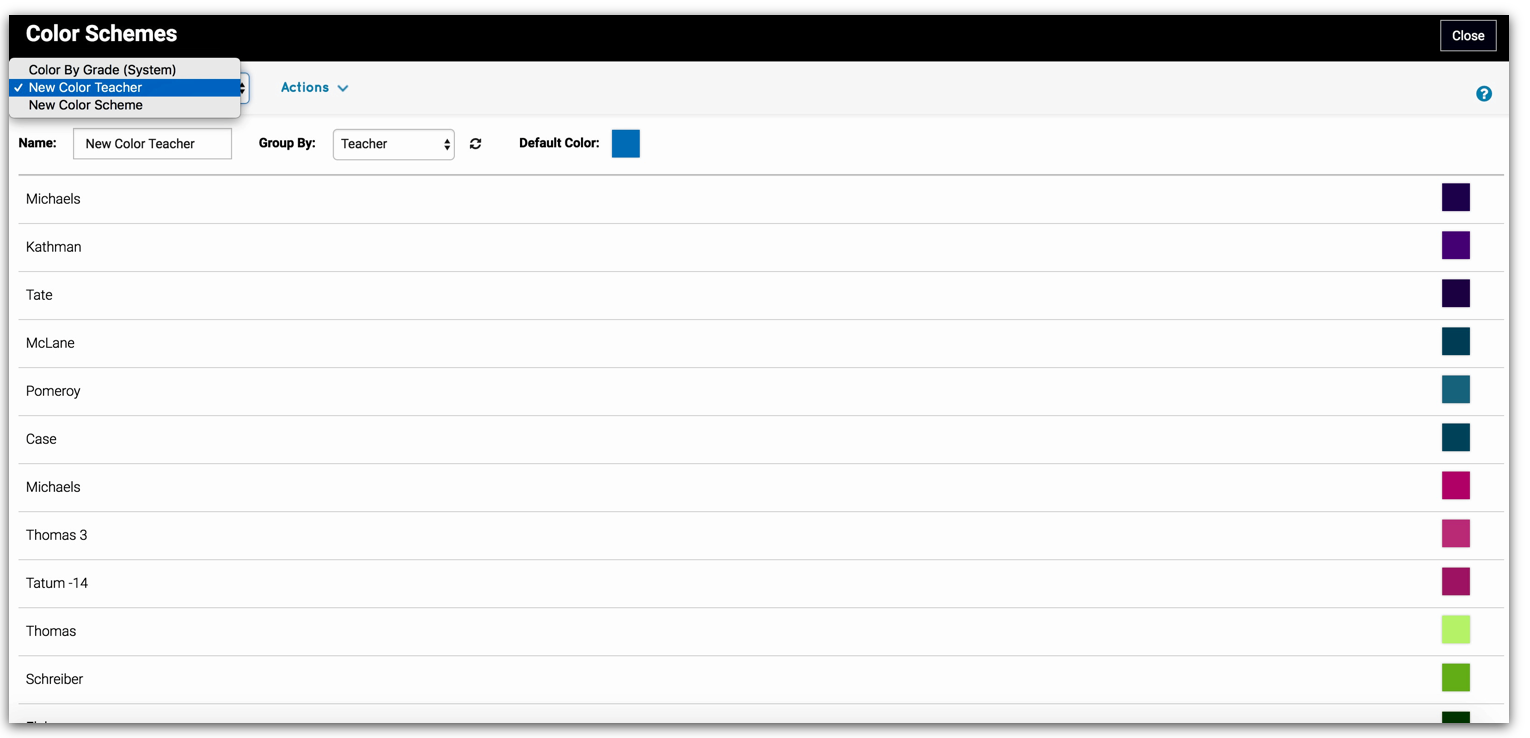
- Customizable color schemes: You can now customize the colors on a schedule by something other than grade! To do this click on the caseload tab, then click ‘actions’ at the top of the page and then ‘manage color schemes’. The default color scheme will be by grade. To add a new color scheme click on ‘actions’ then ‘new color scheme’. You can rename the color scheme (i.e. color by teacher) and then select the group you want to sort the colors by. You can manually override the colors by clicking on a color and selecting a new one. For step by step instructions on how to use the color manager, click the ? in the top right corner.
Once you have created your color scheme, click on the schedule(s) that you want to apply it to and click ‘actions’, ‘edit calendar details’ and then select the new color scheme from the drop down under ‘color scheme’.
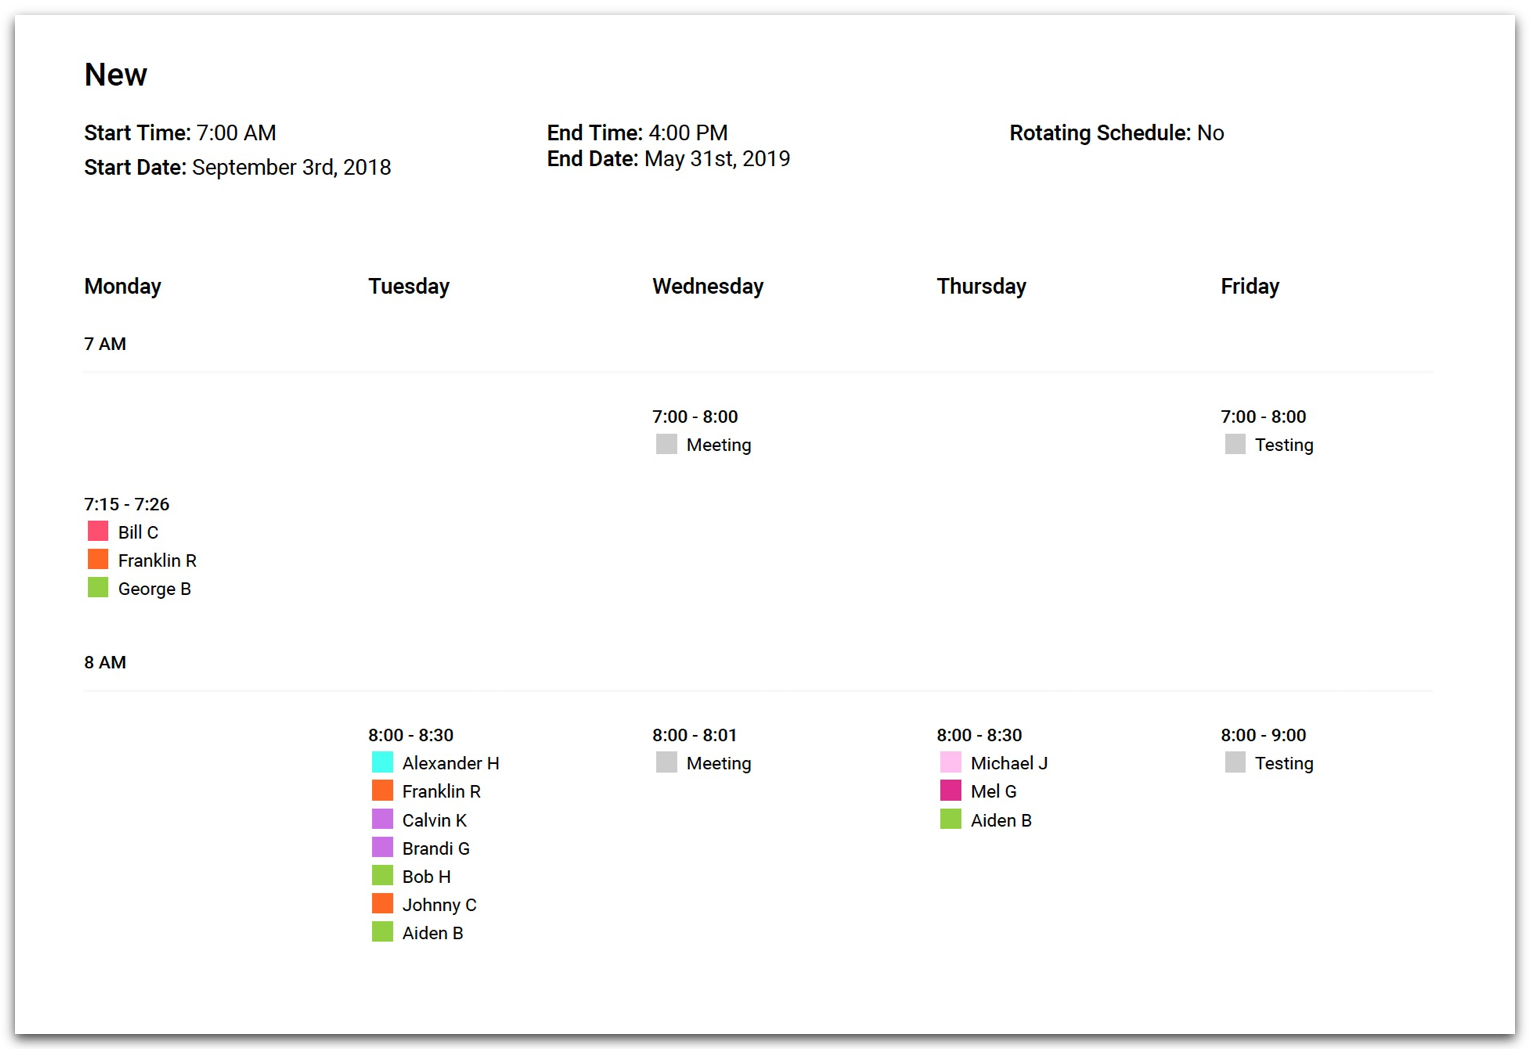
- Improved schedule printout: We have heard from many of you that you would like the schedule printout to look like the view when inside a schedule. The problem with that view is if the service time is less than 15 minutes, or if you have more than 4 students in a group, you aren’t able to see all of the student names. We have come up with a solution that improved the overall appearance of the printout and allows you to see all of the information that you need - and the best part is it prints in color :) The first couple pages of the schedule will be the full day schedule but we did include an image of the overall schedule too! To print the schedule click on ‘actions’ then print.
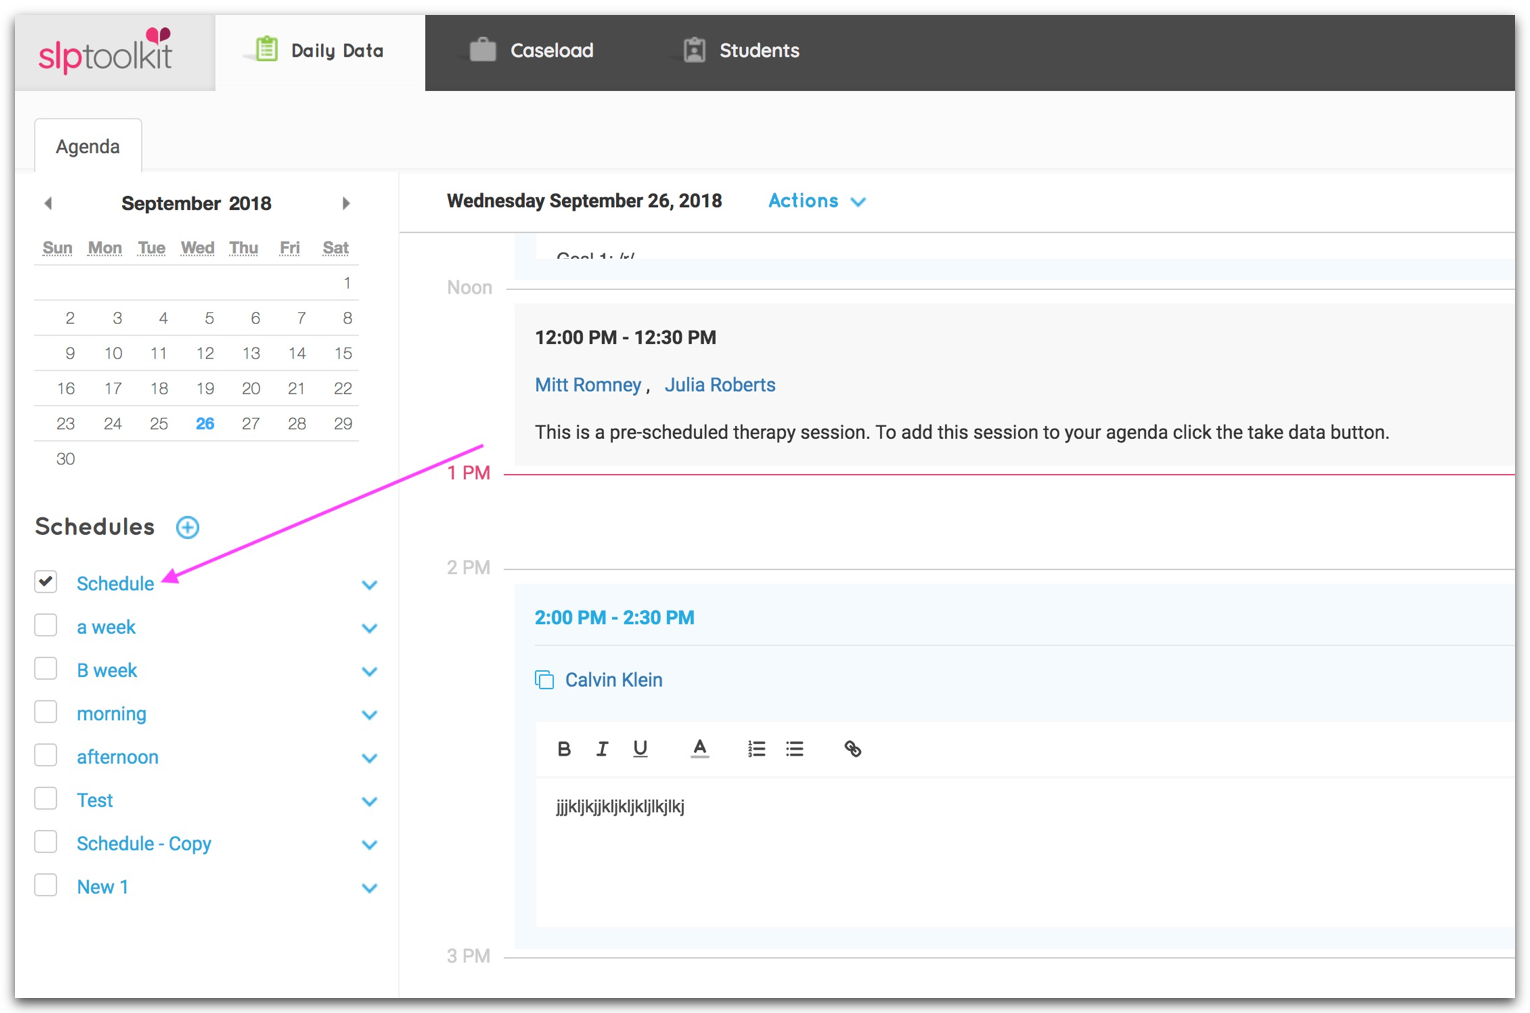
- Open schedule from agenda: You can now click on the name of a schedule to view it rather than going to ‘actions’, ‘edit schedule’.
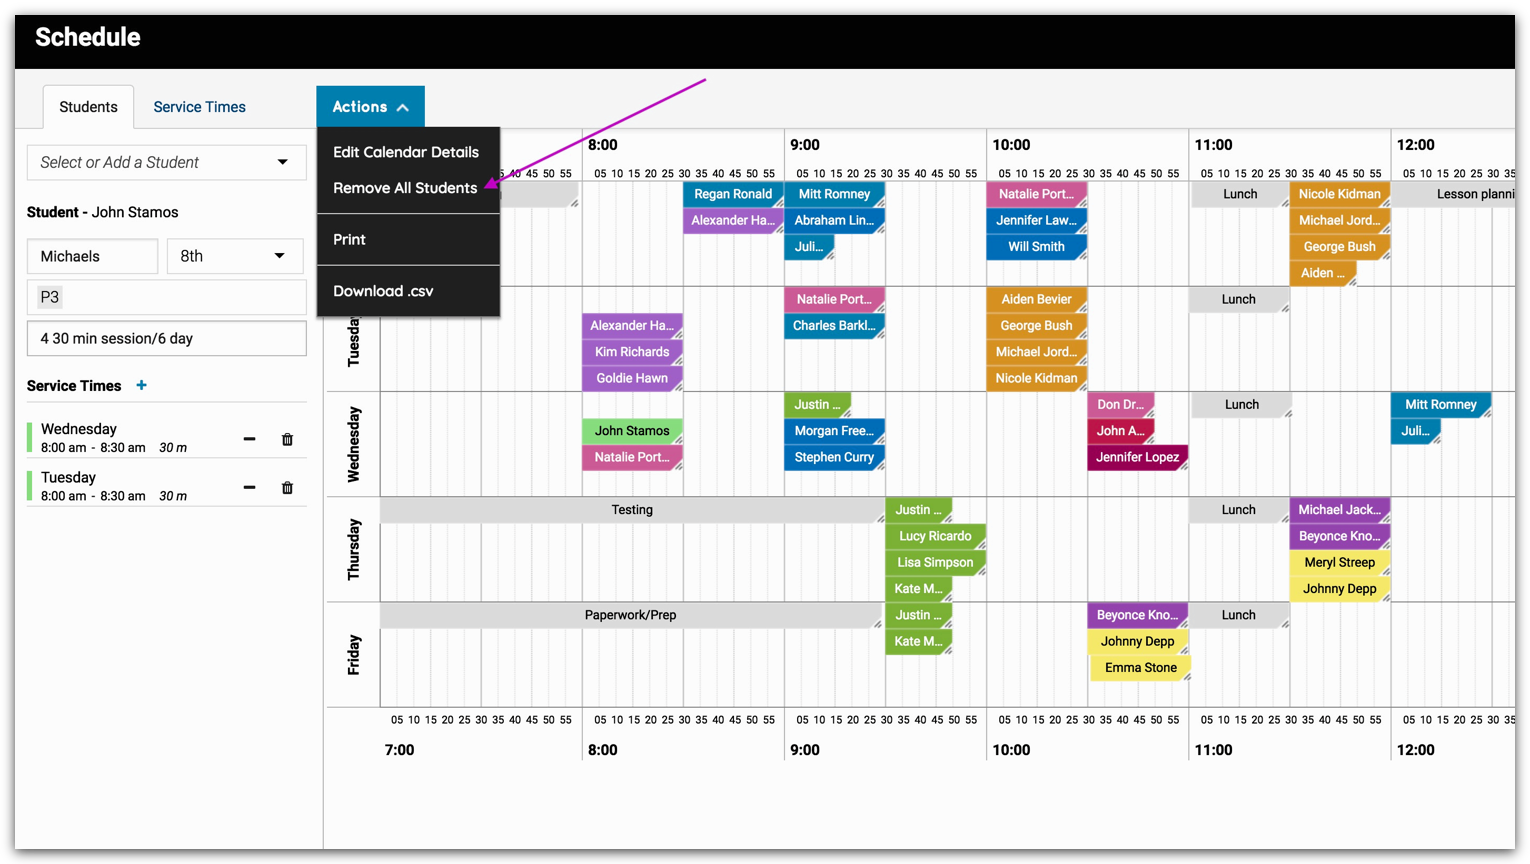
- Remove all scheduled sessions with one click: Because service times are now added in a schedule (versus the old way which was to add to student details) they only apply to that schedule. We did this so that when you create multiple schedules you only have to add the times needed for that specific schedule. But there may be times when you want to create a duplicate schedule and you don’t want to have to re-enter all of the service times. Now you can copy a schedule and then go into the schedule and click ‘actions’, ‘remove all students’. This will pull all of the students off of the schedule but the service times will be saved.
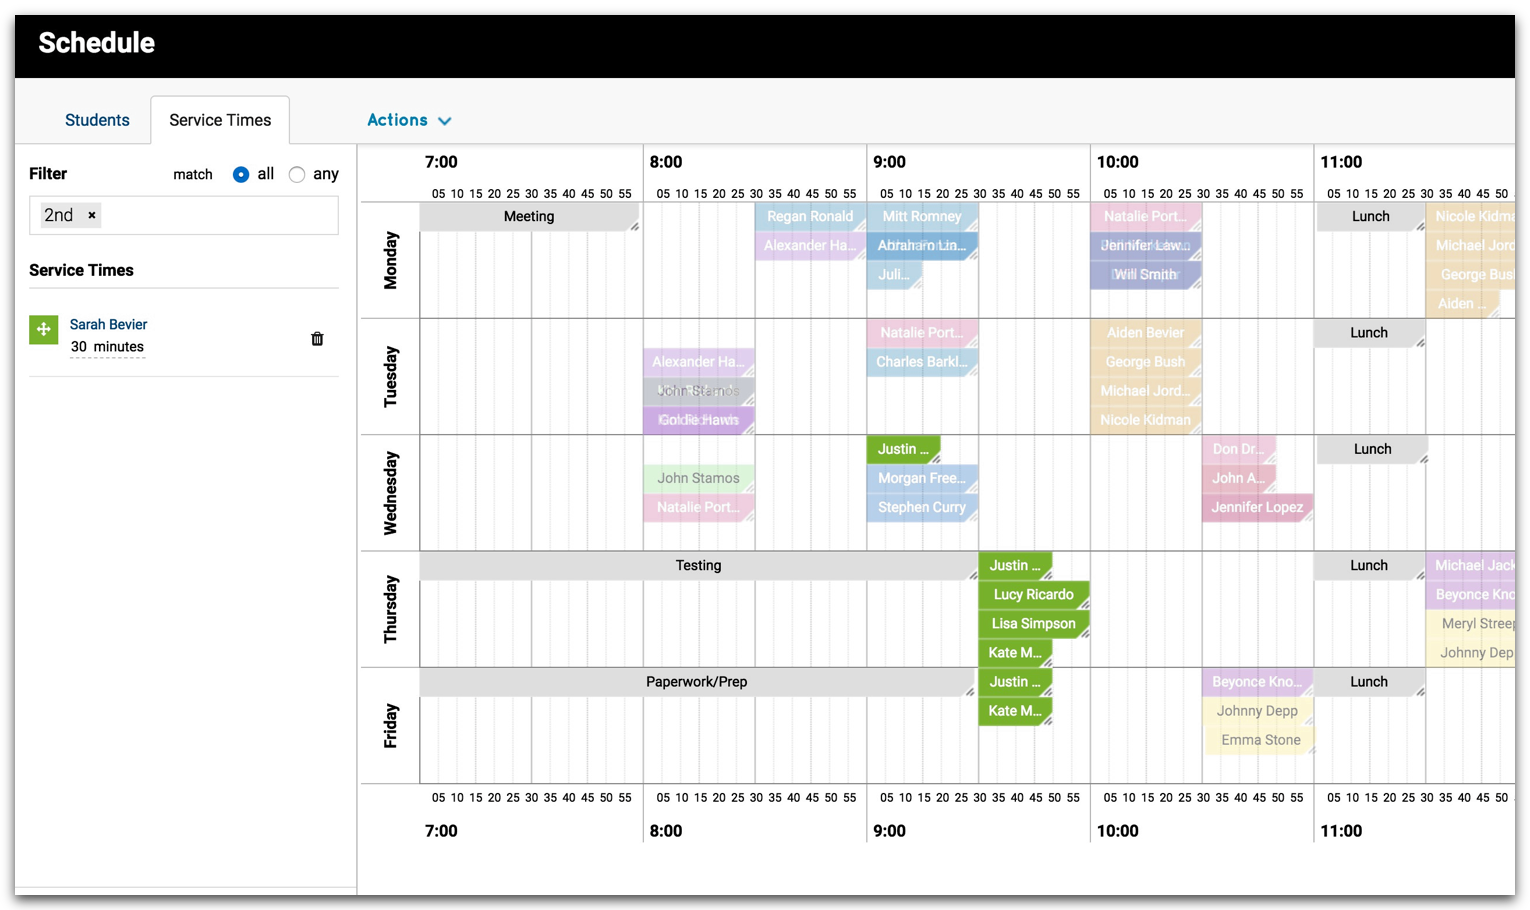
Filter already scheduled students: When you are building out the schedule you are able to filter the list of students by grade, teacher, additional tags and therapy types. With our latest update when you select a filter, anyone who is already on the schedule with that filter will stay colored and everyone else will fade. This will help you to schedule students with already scheduled students who have the same details.
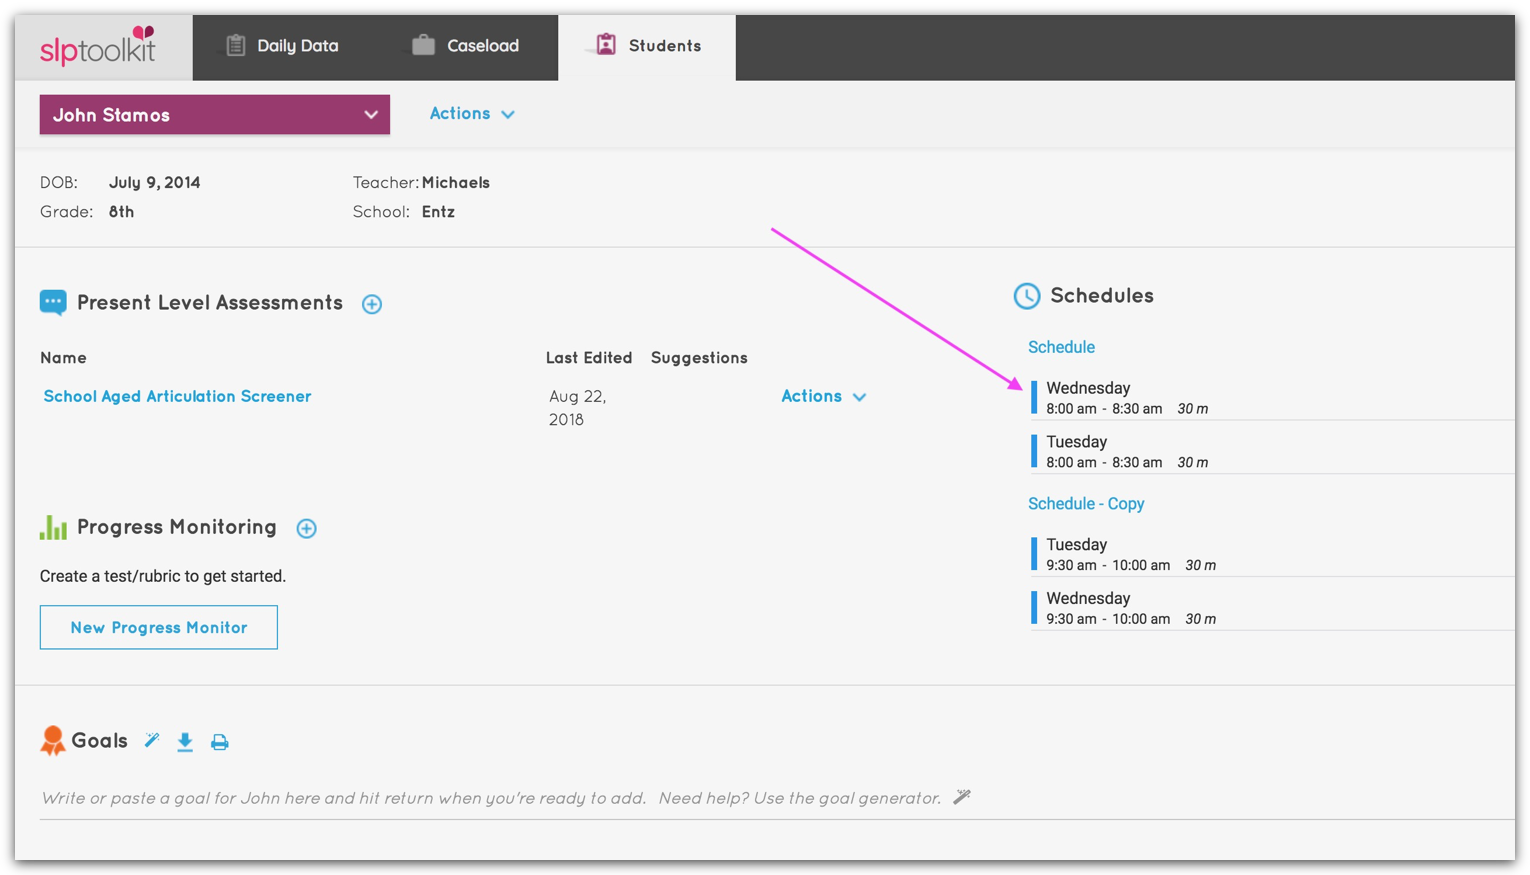
- View/edit schedule from student dashboard: A student’s schedule(s) is now available on the student dashboard. You can view and edit the schedule from the dashboard by clicking on the schedule name.
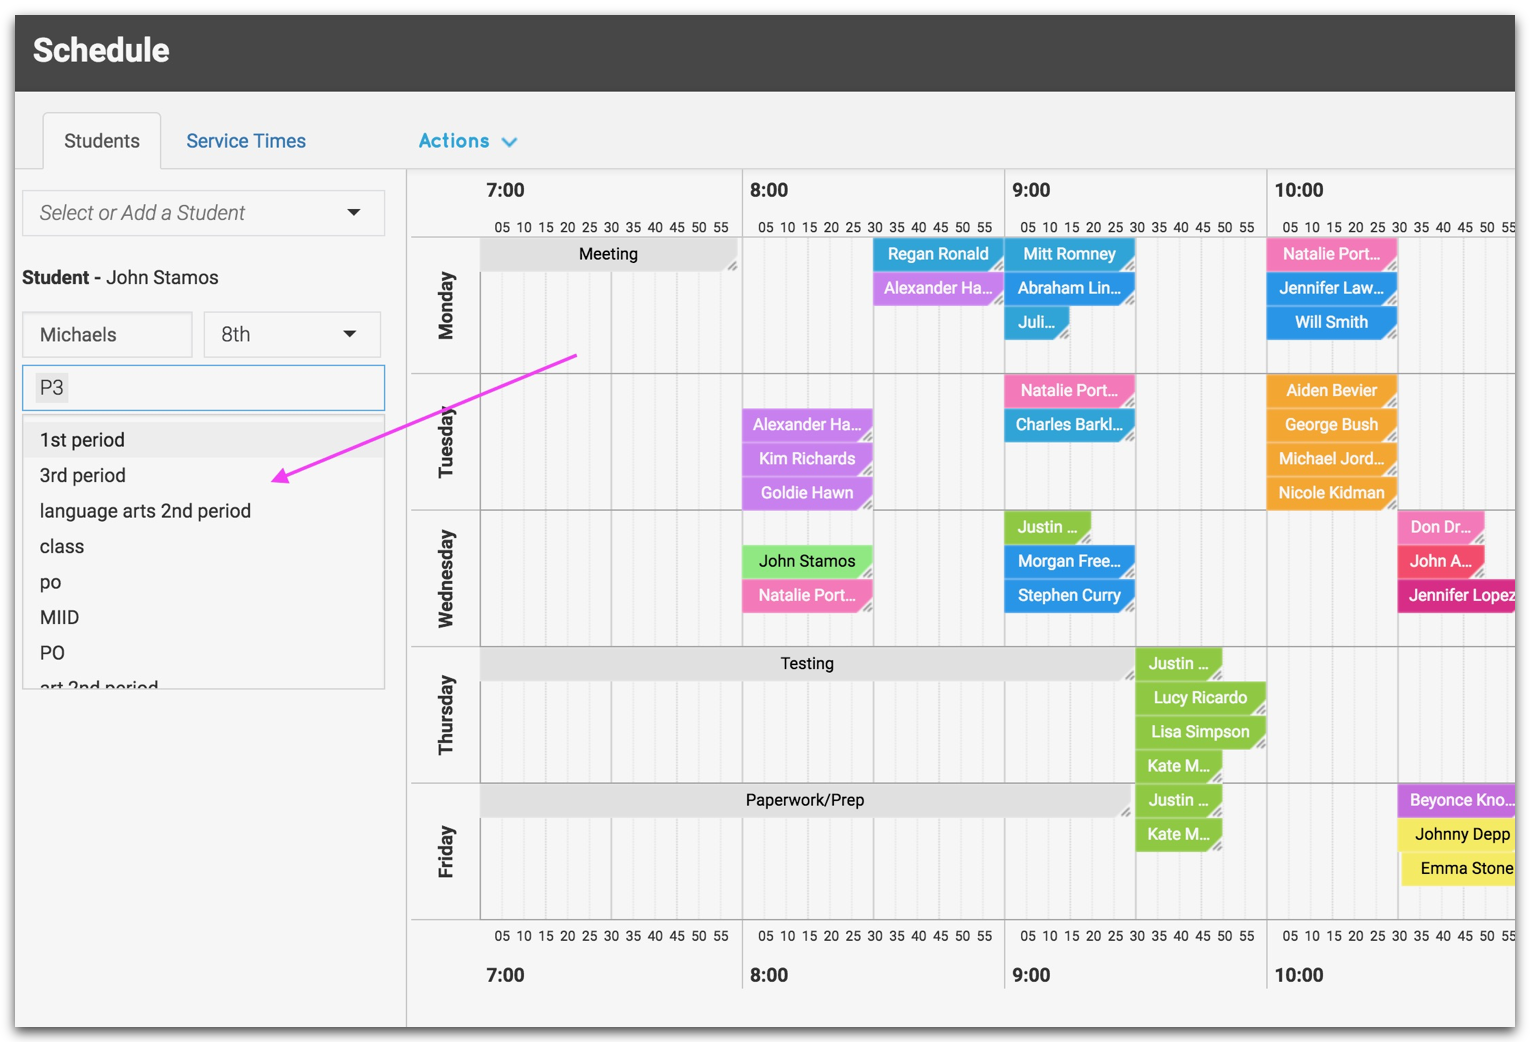
- Additional tags auto-save: Any additional tags that you create will save so that you no longer have to retype the same tag.
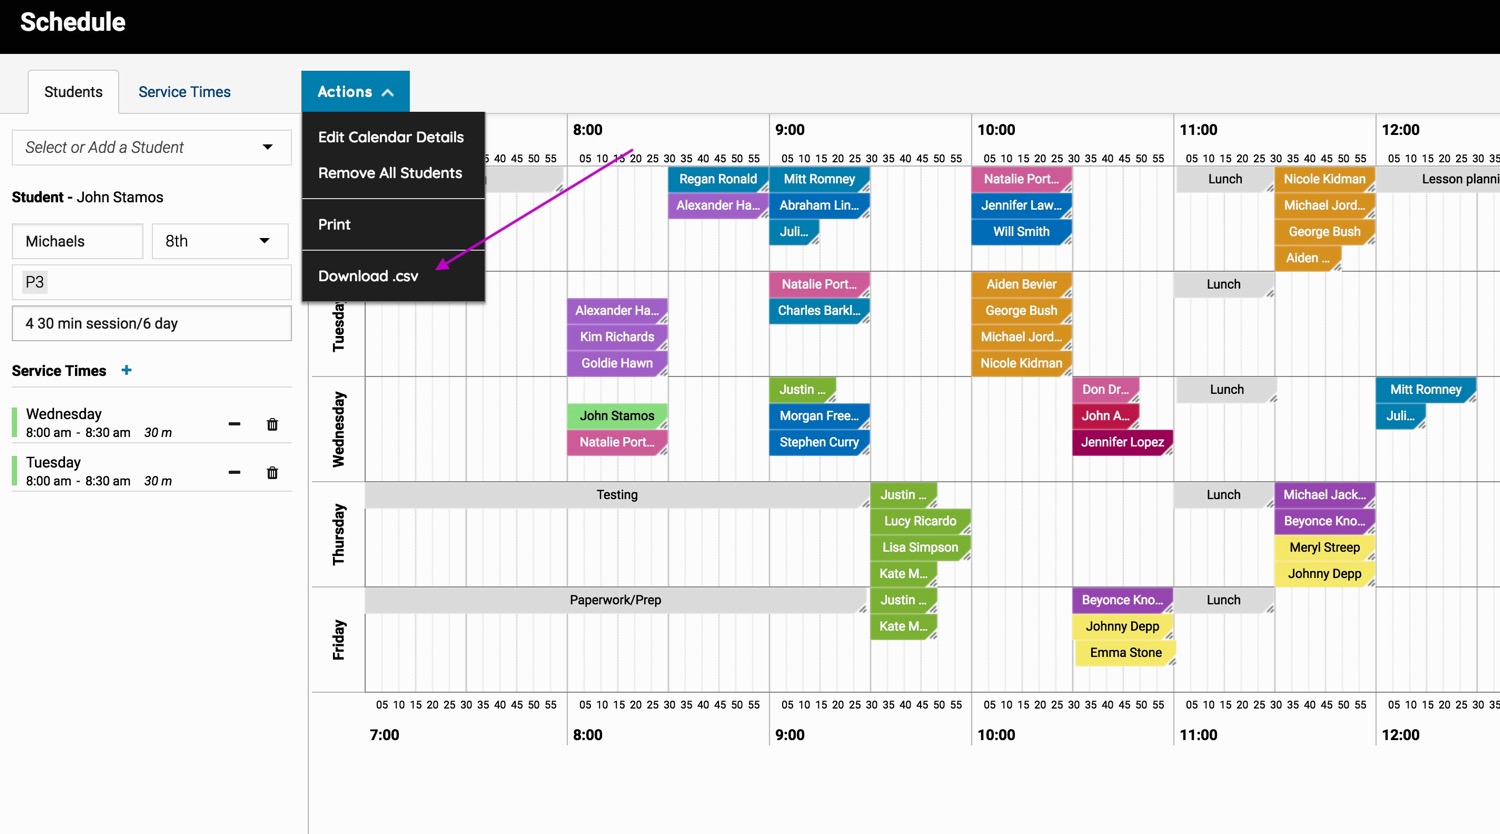
- Export schedule to a .csv: You can now export your schedule to a spreadsheet by clicking on ‘actions’, ‘download .csv’.
We hope you find this update helpful! All of these changes were based on your recommendations - so thank you! We have some exciting updates coming up. Stay tuned!