

August 10 2020
Oh scheduling! You either hate it or you hate it! 😂 I actually liked the puzzle of scheduling - but trying to coordinate 65+ students’ schedules with a list of barriers caused it to take several days…and who has time for that? There are so many factors to consider that my brain literally felt like it had just gone through the hardest workout of its life!
I used to schedule on my whiteboard. I would use different colored sticky notes based on grade and would write each student’s name, teacher and type of therapy. If the student had more than 1 session time then they would have more than 1 sticky note. I would ask the teachers for their preferred times and then would start moving sticky notes around the board until I had something that might just work. Inevitably, even when I thought I had nailed it - I would find that there were conflicts, or a student would move in and it would all come tumbling down.
Creating the sticky notes and trying to remember all of the factors for grouping took forever and I always seemed to miss something. When we started developing the scheduling feature in SLP Toolkit we used this idea of scheduling on a whiteboard and sticky notes but we made it so much better!
Here are some tips for using the scheduler in SLP Toolkit:
1. Determine preferred times for scheduling.
This information can either come from asking the teacher* or for secondary students looking at their schedules and figuring out which periods will work best.
*Here is some fun news - the ‘preferred times’ form is now in the reports in SLP Toolkit. You know longer have to manually complete this form. Go to reports, select preferred times, select the teacher(s) and click generate report.
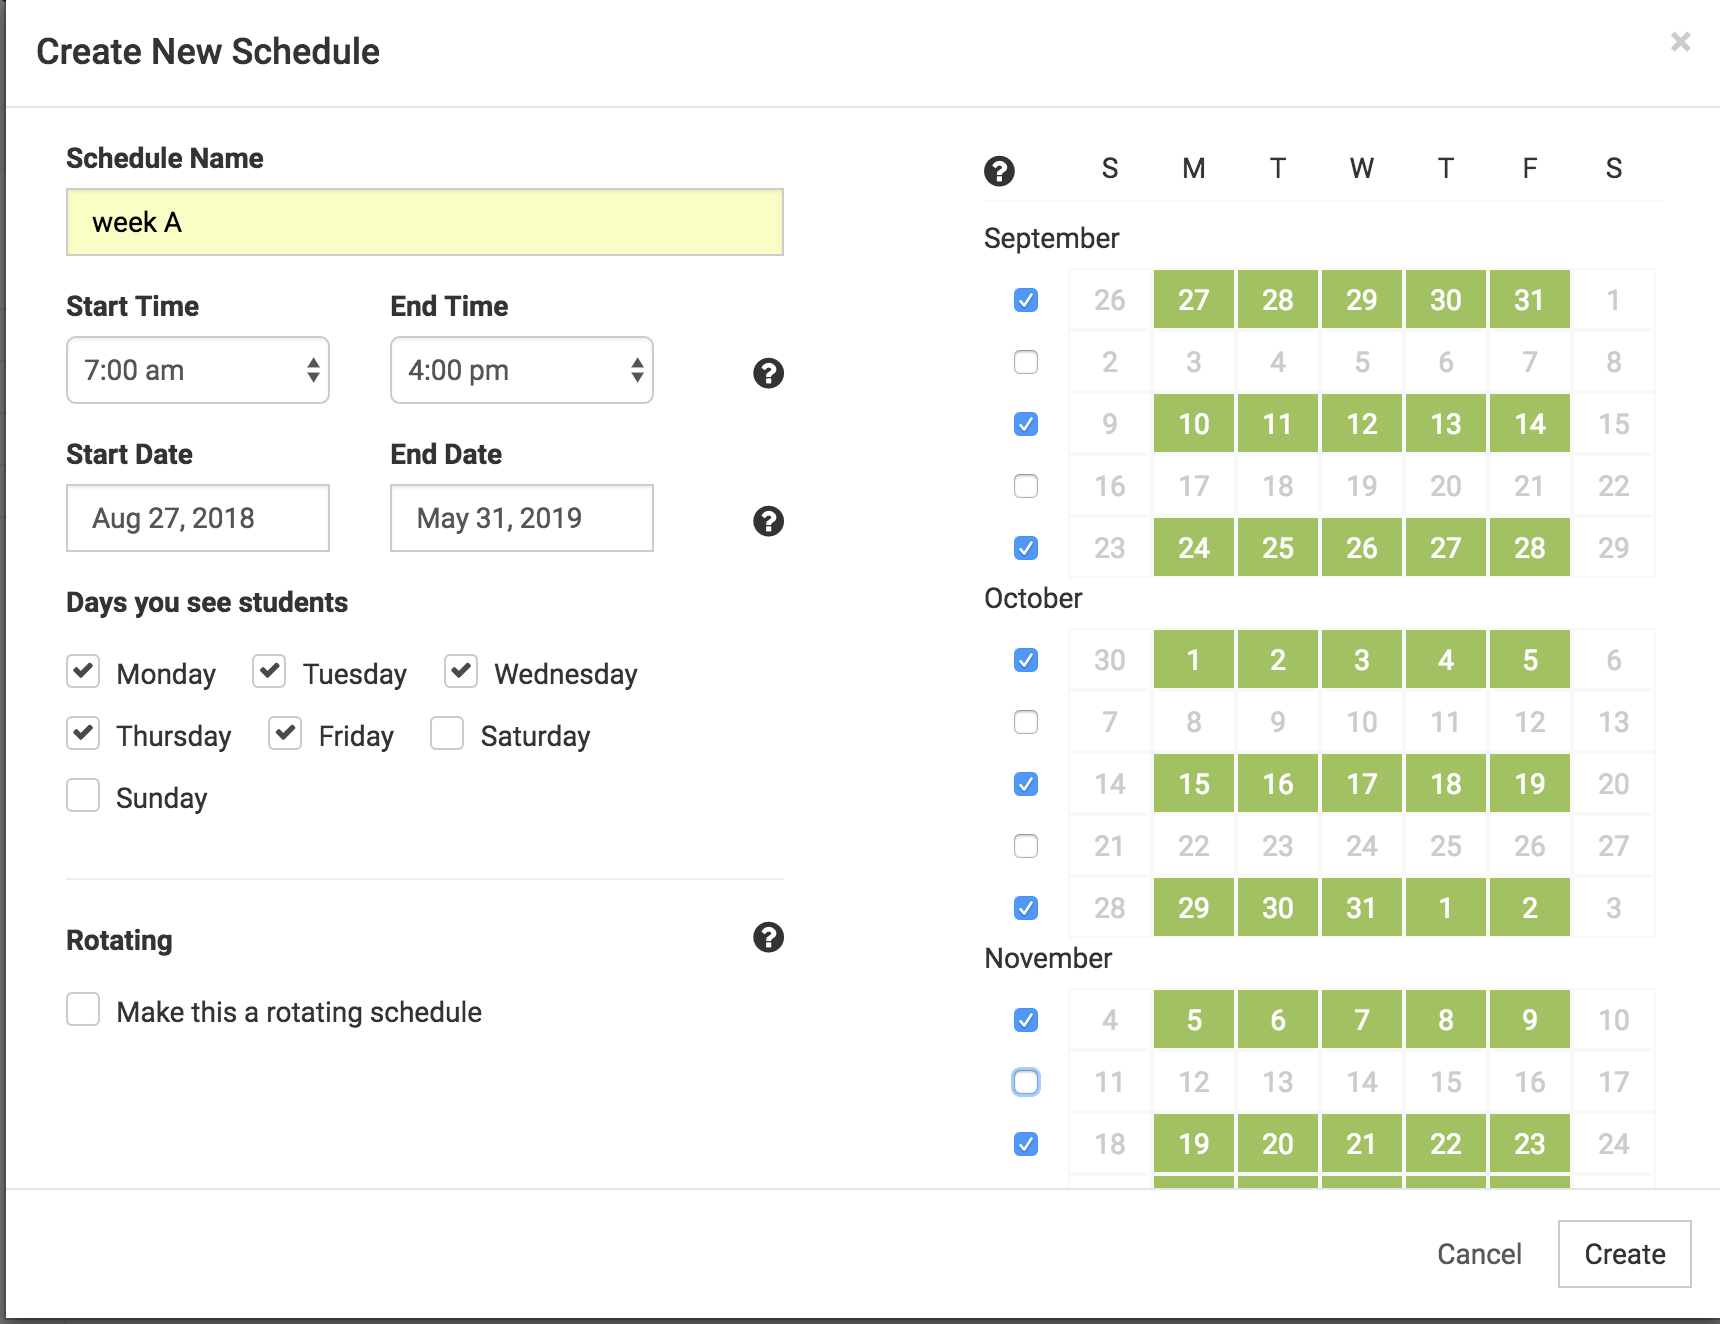
2. Create a new schedule.
Name the schedule and identify your start and end time of your workday. (Note: I would select your entire work day so you can also schedule non-speech events). Enter in the dates you want this schedule to start and end. If this schedule is going to work for every single week then you are good to go. If you need to create multiple schedules (e.g. A week/B week, 3:1 service delivery models), identify on the calendar on the right which weeks this schedule will apply to, then click create.
3. Once you are in the schedule view, add student(s).
If you haven’t already done this in your caseload, add students and the student details that will help with scheduling. The additional tags box is a great place to enter in any ‘filter’ you want to use for grouping students. So if you want to schedule by period, then enter in the periods that work best for this student (e.g. P3 or period 2 art). You can enter as many tags as you need. Enter in the students IEP service minutes to use a reference. Then select the how many sessions and the times for each session. In the example below, Alecia needs to be seen for 120 minutes a month. I can create one session for 30 minutes or break that into two 15 minute sessions. This is based on how you can best meet the needs of this student.
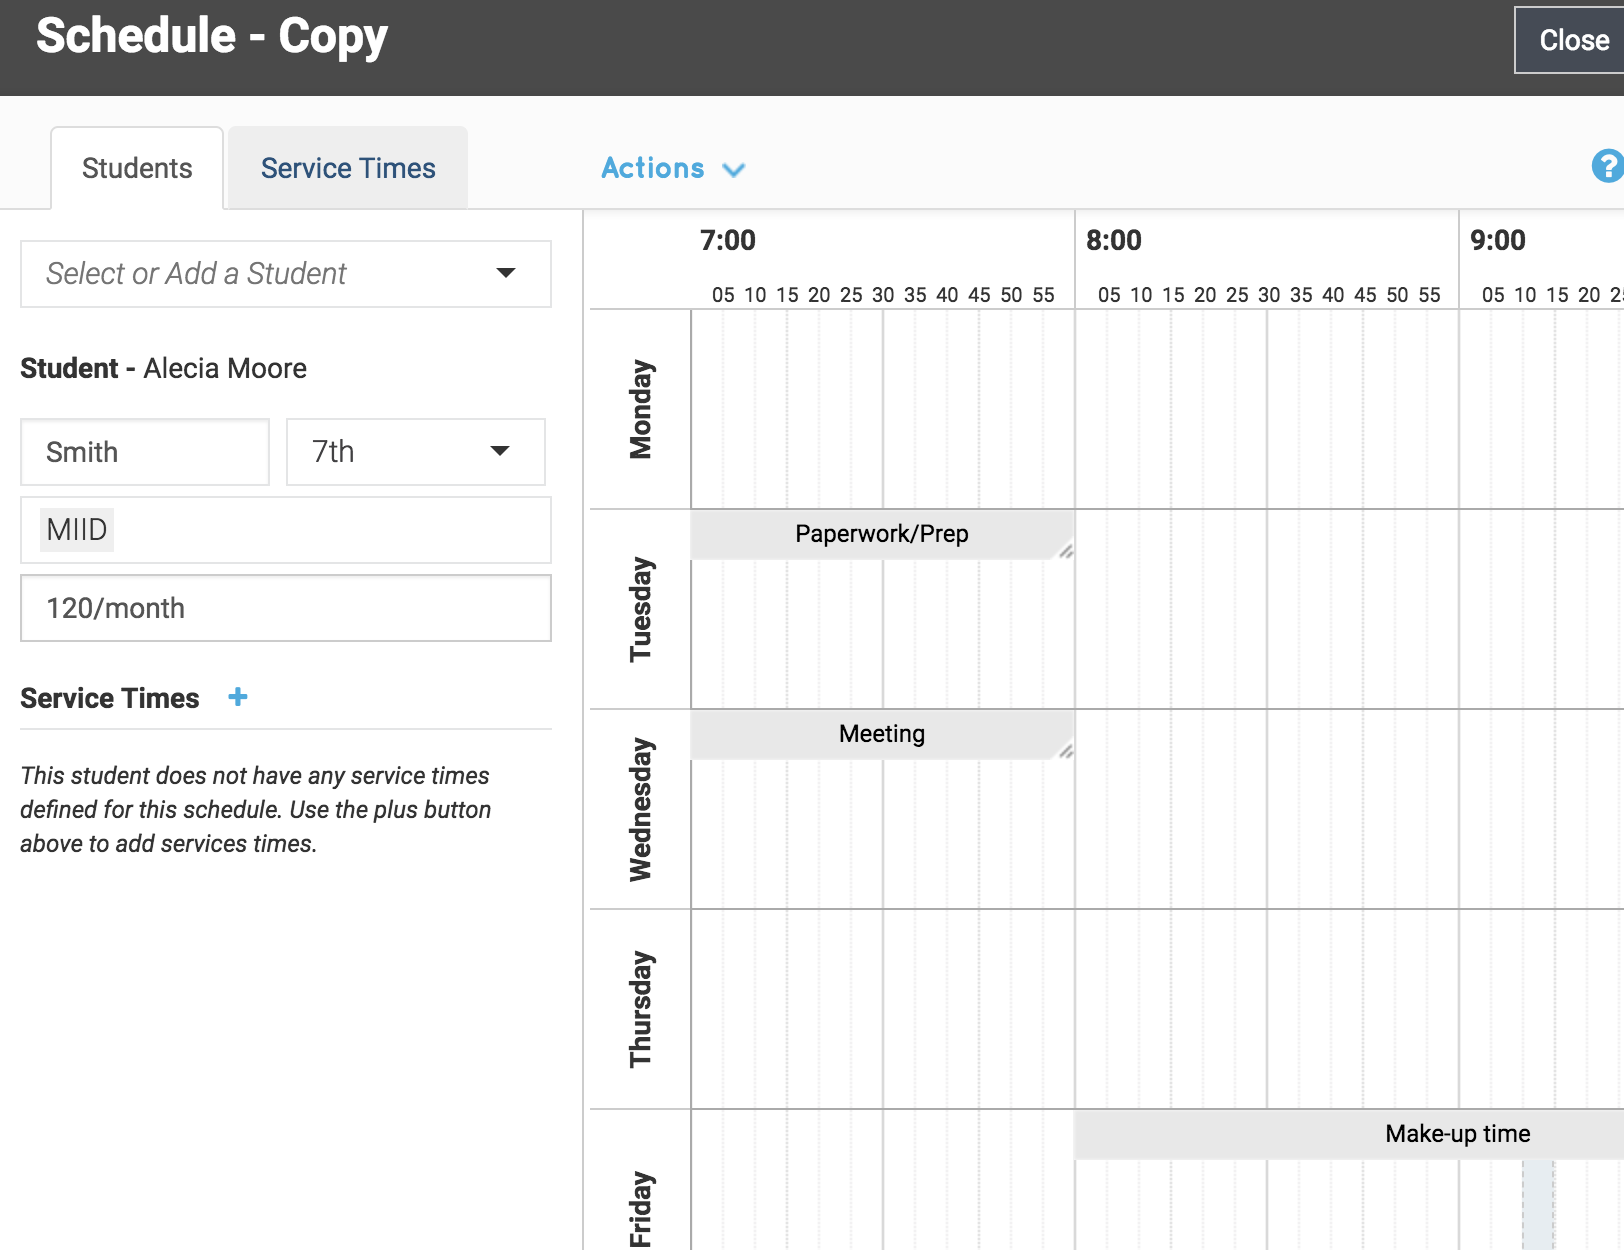
4. Once you have all of your student’s details and session times entered click on the service times tab.
Here you will see all of the students and their session times that need to be placed on the schedule. Now the fun part begins :) Filter by how you would like to group students. This can be by the teacher, grade, or additional tags that you have created. If you want to filter by multiple factors match by ‘any’ rather than ‘all’ - all means that the students need to match everything listed.

5. When you are ready to schedule a group, select the preferred times.
To do this, highlight those time blocks with your mouse on the schedule and click ‘Schedule’ in the bottom left corner. When you are ready to schedule the next group, clear the selected times and filter the list. Continue this process until all of the students are on the schedule and the list on the service times tab is empty.

6. Adjust your schedule as needed.
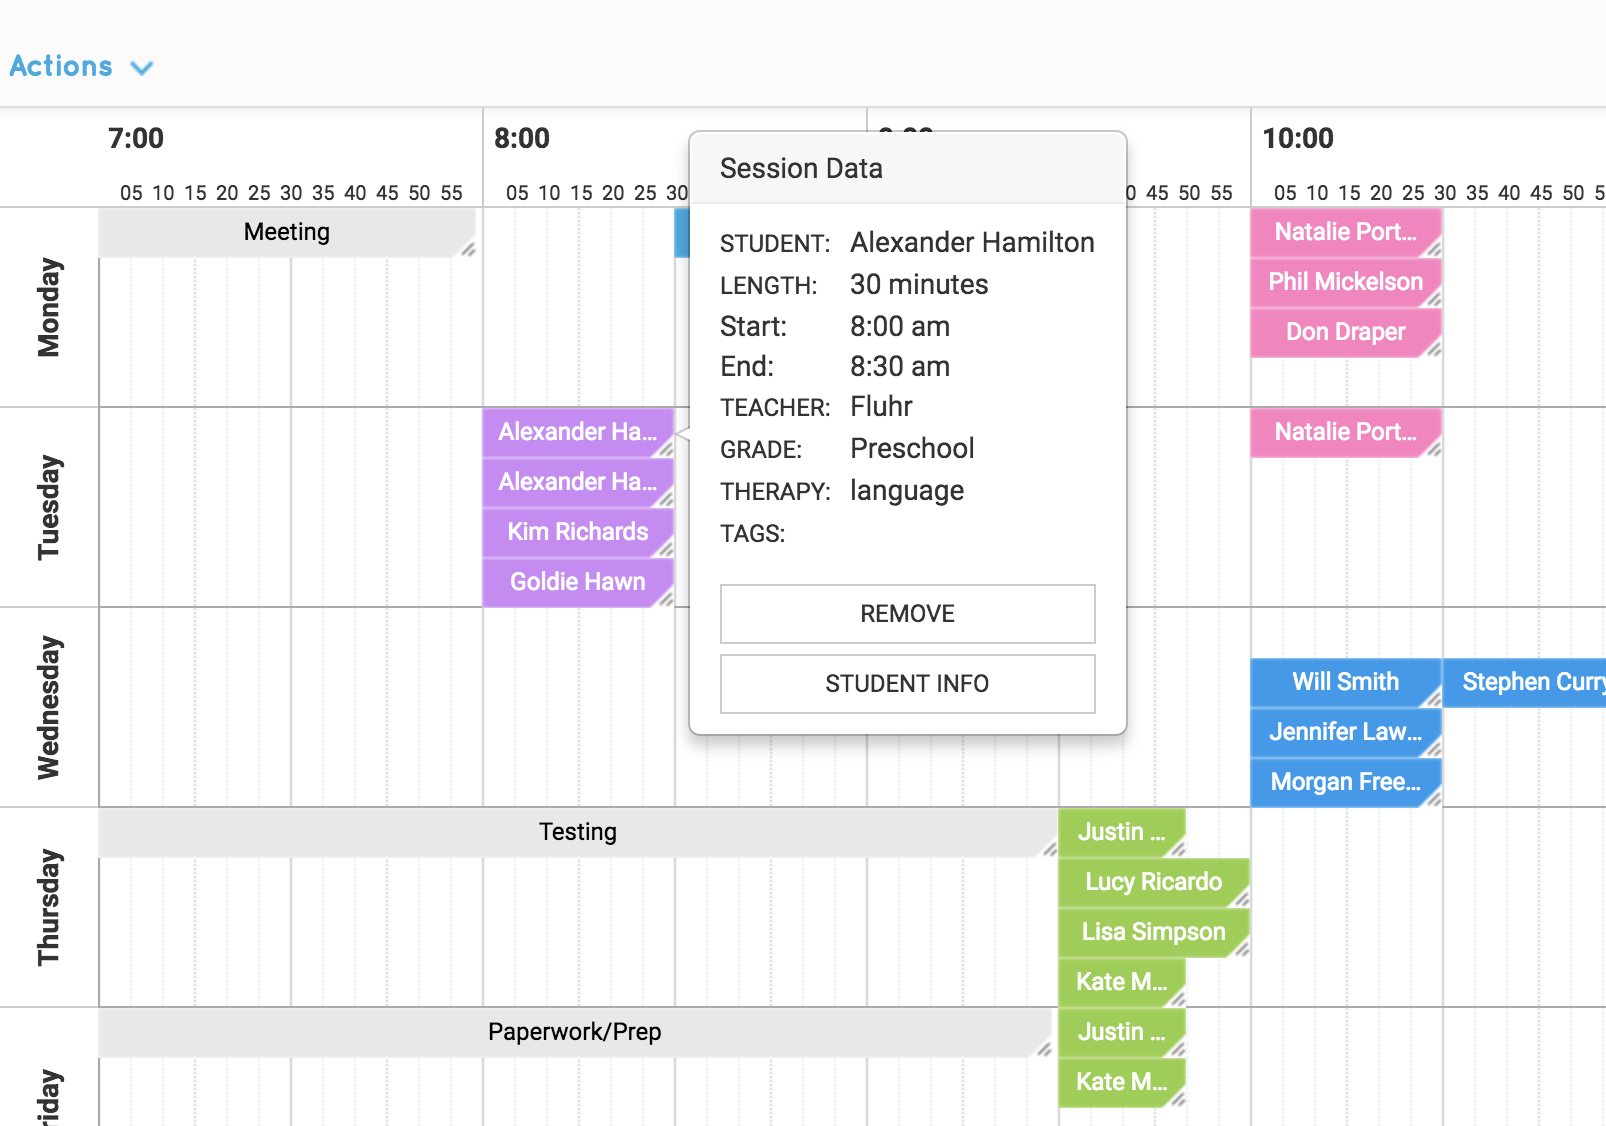
The schedule will make sure students with multiple sessions are not scheduled on the same day. It will also limit sessions to 4 students per group. You can override this by manually moving students around the schedule. If there are more than 4 students per group you will cover names but they will show up correctly on the printout and on the daily data agenda. You can hover over a student’s time on the schedule to see student details. This may help you to confirm you have grouped students effectively.
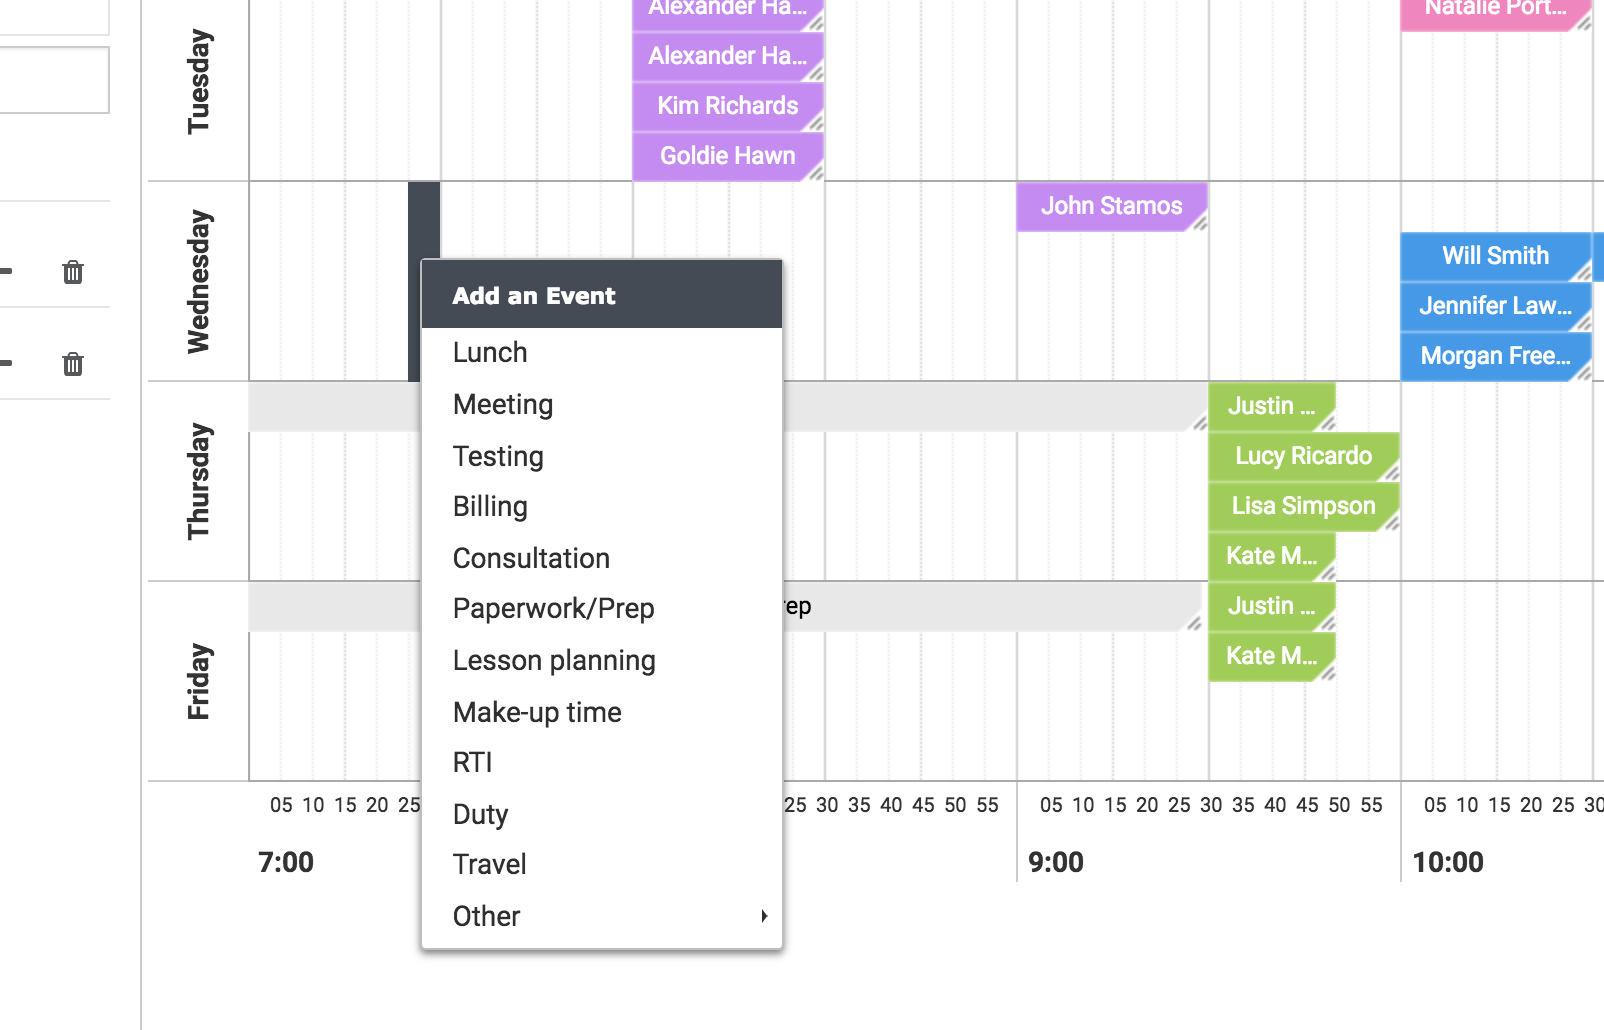
7. To add non-speech events to the schedule, right-click to see a list of pre-populated text or select other to create a custom event.
Non-speech events default to 30 minutes. If you hover over the right corner of the event you can decrease/increase this time.
We hope that you will find the scheduler to be an awesome way to schedule and that it will make the process much faster! We have received feedback from users that they are able to complete their schedules in less than an hour! But if you have a different method that works better for you we still recommend adding your students to the schedule in SLP Toolkit. This allows for your groups to show up on the daily data agenda and makes data collection so much more convenient! Haven’t tried out daily data yet? It’s a game changer! We will share more about this in another post!
Happy scheduling!
Sarah
P.S. Would you rather see a video of the scheduler in action? Click here!